2026 Best Solar Street Lights How to Install Without Help?

Time:2026-09-17 Author:Liam
0%

Choosing the 2026 best solar street lights does not always require a contractor. With careful planning, many homeowners, farmers, and small property managers can complete installation safely. This guide explains How to install solar street lights without professional help, using clear steps and realistic expectations.

Solar lighting engineer Daniel Harper says, “A good installation begins with sunlight, not the light fixture.” That advice matters. A shaded panel can leave a bright lamp powerless before midnight. Check the site during different hours. Watch nearby trees, rooflines, and seasonal shadows. Measure the pole location carefully, then confirm that pedestrians and vehicles will not face glare.

The process usually includes choosing a suitable light, marking the foundation, securing the pole, connecting the panel, and testing the battery. Wear gloves and eye protection. Use a stable ladder, not a chair or improvised platform. Keep every connector dry. Follow the manufacturer’s wiring diagram exactly. Some models arrive prewired, while others require careful polarity checks.

Do not rush the concrete work. A leaning pole creates trouble later. Allow the foundation to cure fully before mounting heavy equipment. Local building rules may also require approval, especially near roads or public walkways. That part is easy to overlook.

Expect a learning curve. My first layout might look tidy, yet still waste afternoon sunlight. Recheck it. After installation, test brightness, motion settings, charging performance, and nighttime coverage for several evenings. Small adjustments can improve reliability. Independent installation can save money, but safety and honest evaluation should guide every decision.
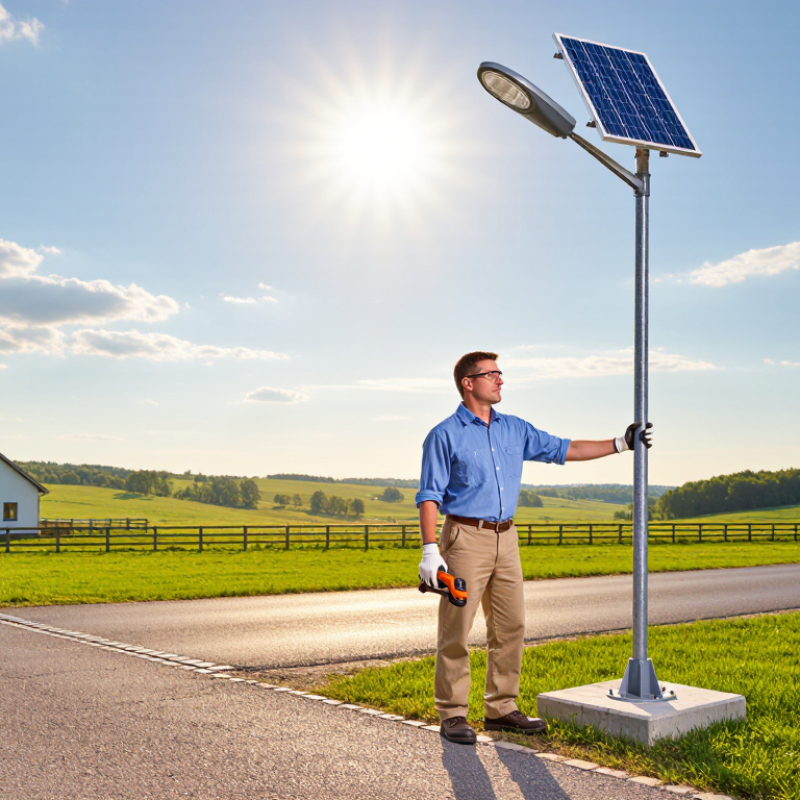
2026 Best Solar Street Lights How to Install Without Help?

Choosing the Best Solar Street Light for Your Location

Choosing the Best Solar Street Light for Your Location

The best solar street light depends on your site, not its advertised brightness. I first check sunlight, road width, pole height, and nighttime activity. A south-facing panel usually performs well in open areas, but nearby trees can create long winter shadows. That detail is easy to miss.

Match the light output to the location. A narrow pathway may need moderate illumination, while a parking entrance needs wider coverage. Check the battery’s autonomy rating, especially if cloudy weather is common. Three nights of reserve can be useful in regions with frequent rain. The panel should also suit local temperatures and seasonal sunlight. Cold conditions can reduce battery performance.

Look for a weather-resistant housing with a suitable IP rating. Salt air, dust, and heavy rain require stronger protection. Motion sensors can reduce energy use, but poor sensor placement may cause irritating flicker. I prefer adjustable mounting brackets because walls and poles rarely align perfectly. Installation can be simple with a clear manual, prewired parts, and stable ground anchors. Still, working at height alone is risky, and local electrical or construction rules may require professional assistance. My first layout is rarely perfect; after one week, I inspect dark patches, false sensor triggers, and unexpected shadows. Small adjustments often improve the result more than buying a brighter lamp.

Preparing Tools, Mounting Points, and Safety Equipment

2026 Best Solar Street Lights: How to Install Without Help?

Prepare every tool before opening the carton. You may need a tape measure, pencil, spirit level, adjustable wrench, socket set, drill, masonry bits, cable ties, and a torque wrench. Wear cut-resistant gloves, safety glasses, and a stable helmet.

The International Energy Agency Photovoltaic Power Systems Programme reported over 400 GW of new solar capacity in 2023, showing how quickly solar equipment is entering everyday infrastructure. Still, fast growth does not replace careful preparation.

Choose a mounting point with direct sunlight and clear sky exposure. Avoid tree shadows, roof edges, loose walls, and areas where vehicles may strike the pole. Measure the anchor spacing against the supplied base plate. Mark each hole twice. A small error can twist the lamp later.

Use a spirit level before tightening bolts, then check the panel angle and light direction from ground level. OSHA identifies falls as a leading cause of construction fatalities, so never stand on an unstable chair or climb while holding tools. One mistake is enough.

Tips: Work during daylight and dry weather. Keep tools in a waist pouch. Ask another adult to steady the ladder, even if you plan to work alone. Check the lamp after sunset.

My own practical warning is simple: installation instructions can look clear, yet foundation strength is easy to overestimate. If the wall sounds hollow, stop and reassess. Use the manufacturer’s torque values and follow IEC 60598-2-3 principles for road and street lighting safety.

Installing the Pole, Solar Panel, Battery, and LED Lamp

Installing a solar street light alone is possible when the system is designed for simple assembly. Choose a firm location with direct sunlight and enough clearance from trees. Mark the pole position, then dig a stable foundation according to the manufacturer’s dimensions. A level base matters. Even a small tilt can affect the lamp’s direction.

Assemble the pole sections on the ground before raising them. Secure every bolt, and check the threads for damage. My first installation had one loose fastener, which caused annoying movement in strong wind. Use a temporary support or lifting tool when raising a heavy pole. Do not force the work alone if the structure feels unstable. Safety should outrank speed.

Attach the solar panel near the top, facing the strongest daily sunlight. Keep its surface clear of shadows, dust, and nearby branches. Install the battery inside the protected compartment, with terminals covered and connections matched to the wiring diagram. Connect the battery before testing the LED lamp, and protect cables from sharp metal edges. Aim the LED lamp toward the road or pathway, then tighten its bracket after checking the light pattern at night. Test charging during daylight and confirm automatic operation after dark. Small mistakes show up later. Recheck the pole, panel angle, and cable seals after the first windy day.

2026 Best Solar Street Lights: Typical DIY Installation Time

This chart presents practical time estimates for installing the main components of a standalone solar street light. Actual installation time depends on pole height, foundation conditions, wiring design, weather, and local safety requirements. Always secure the pole properly and test the system before final use.

Connecting Components and Adjusting the Lighting Settings

2026 Best Solar Street Lights: How to Install Without Help?

Connecting Components and Adjusting the Lighting Settings

Installing a solar street light alone is possible when the unit is lightweight and clearly designed for home assembly. Check the pole, lamp, solar panel, battery, screws, cables, and control unit before lifting anything. Lay every part on a clean cloth. This prevents small washers from disappearing in grass.

Connect the solar panel cable to the charging port, then attach the lamp cable to the lighting output. Match the marked positive and negative terminals carefully. Never force a connector. A loose plug may cause flickering after sunset. Tighten each screw gradually, and keep cables inside protective tubing. The pole must stand firmly on a level, compact surface. I once ignored a slightly loose base, and wind exposed the mistake quickly.

Adjust the panel toward the strongest daily sunlight, away from trees, walls, and night lighting. Set the lamp to automatic mode, then choose brightness and operating hours. A motion sensor can save power in quiet areas. Test the light by covering the panel for several minutes. It should turn on without delay. Check the settings again after one cloudy day. Solar output changes with weather, and my original brightness setting was too high for winter. Follow the installation instructions and local electrical requirements, especially when securing a tall pole.

Testing the Light and Maintaining It for Long-Term Use

After installation, test the light before trusting it overnight. Wait until the solar panel receives several hours of direct sunlight. At dusk, cover the panel with a dark cloth. The lamp should activate within a few seconds. Check brightness, motion response, and the lighting area. I once tested a unit too early on a cloudy afternoon. Its weak output looked like a fault, but the battery simply lacked charge. That mistake taught me to test under normal conditions.

Record the start time and observe the light through the night. A reliable unit should match its stated runtime under similar weather conditions. Check for flickering, delayed activation, or sudden dimming. These signs may indicate loose wiring, a dirty panel, or a tired battery. Do not touch exposed electrical parts while the system is wet. Wear gloves when cleaning, and switch the unit off if possible. Small details matter.

Clean the panel monthly with a soft, damp cloth. Remove leaves, dust, and bird deposits without abrasive products. Inspect the pole, screws, cable entry, and waterproof seals after heavy rain or strong wind. Keep nearby branches trimmed, because afternoon shade can reduce charging. In winter, check more often. Replace the battery according to the installation manual and local waste rules. Keep a simple maintenance log. I sometimes forget this step, yet dates reveal slow performance changes before failure. If water enters the housing, stop using the light and seek qualified service.

FAQS

How do I choose the right solar street light for my location?

Check sunlight, road width, pole height, and nighttime activity. A narrow path needs less coverage than a parking entrance. Advertised brightness alone can mislead.

Where should I place the solar panel?

Choose an open area with strong daily sunlight. Keep trees, walls, and branches away from the panel. Winter shadows may stretch farther than expected.

How much battery reserve is useful?

Three nights of reserve can help in rainy regions. Cloudy weather reduces charging. Cold temperatures may also reduce battery performance.

Can I install a solar street light alone?

You may manage a lightweight system with clear assembly instructions. Tall poles and heavy parts require extra support. Safety comes first. Ask for professional help when needed.

What should I check before raising the pole?

Assemble the sections on the ground first. Check every bolt, thread, cable, and connection. Use a lifting tool or temporary support. Do not force unstable work.

How should I connect the components?

Match the marked positive and negative terminals carefully. Connect the panel, battery, lamp, and control unit as shown. Never force a connector. A loose plug may cause nighttime flickering.

How can I adjust the light settings?

Use automatic mode, then set brightness and operating hours. Motion sensors can save energy in quiet areas. Test the sensor by covering the panel briefly. Recheck settings after cloudy weather.

What maintenance checks improve performance?

Inspect dark patches, false sensor triggers, shadows, and loose fasteners after one week. Clean dust from the panel. Check cable seals after strong wind. Small errors spread.

Conclusion

This guide explains how to install solar street lights without professional help by following a clear, practical process. It begins with choosing a suitable solar street light for your location, considering sunlight exposure, installation height, lighting coverage, weather conditions, and ground stability. Before starting, prepare the necessary tools, identify secure mounting points, and use appropriate safety equipment to reduce installation risks.

The installation process includes securing the pole, positioning the solar panel for maximum sunlight, installing the battery, and attaching the LED lamp firmly. Next, connect the components according to their instructions, check the wiring carefully, and adjust lighting modes, sensitivity, and operating times to suit your needs. Finally, test the light at night to confirm proper charging, illumination, and automatic operation. Regularly cleaning the solar panel, checking connections, inspecting the pole, and replacing worn components will help maintain reliable performance over the long term.

Liam

Liam

Liam is a dedicated marketing professional with a profound expertise in the industry, where he excels at highlighting the unique advantages of our core products. With a keen understanding of market trends and consumer needs, Liam frequently updates our company’s professional blog, providing......